
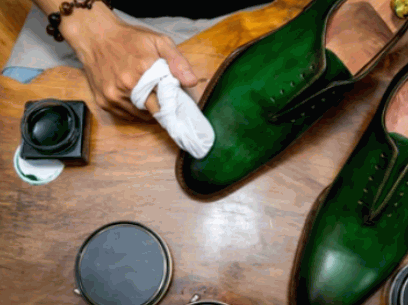
Have you ever wanted to give your leather shoes a fresh new look without breaking the bank?
Dyeing your leather shoes at home is a fun and cost-effective way to breathe new life into your footwear.
We will walk you through the materials you’ll need, how to prepare your shoes for dyeing, the types of dyes you can use, and step-by-step instructions on how to dye your leather shoes.
We’ll also share tips for maintaining your dyed shoes and common mistakes to avoid. Let’s get started!
Why Dye Leather Shoes at Home?
Dyeing leather shoes at home allows you to customize the color of your leather items, providing a unique and personal touch to your footwear collection. This process not only saves money compared to professional services but also gives you creative control over the final look.
What Materials Do You Need?
To successfully dye leather shoes at home, you will need a variety of materials including high-quality leather dye, a brush for application, painter’s tape to protect areas you don’t want to be dyed, and alcohol for cleaning the leather.
Another essential material for the process is leather preparer and deglaze, which helps in ensuring the leather surface is properly prepped for dyeing, allowing for better adhesion and longevity of the color.
- Leather dye is a popular choice among DIY enthusiasts due to its vibrant color options and durability. Having a soft cloth for buffing the dye after application is crucial to achieve an even finish without streaks or smudges.
A finisher or sealer is needed to protect the dyed leather from wear and tear, providing a glossy or matte finish depending on your preference.
How to Prepare the Leather Shoes for Dyeing?
Proper preparation of leather shoes is crucial for achieving a smooth and even dye application. Start by using a Leather Stripper or Acetone to remove any existing finish or polish from the shoes.
Cleaning the Shoes
Begin by thoroughly cleaning your leather shoes with alcohol to remove dirt, oils, and any previous polish that may interfere with the dyeing process.
Use a soft cloth or sponge dampened with isopropyl alcohol to gently wipe down the surface of the shoes, making sure to reach all crevices and seams.
It’s crucial to eliminate any residues that could affect the absorption of the dye later on and result in uneven coloring.
After cleaning, allow the shoes to dry completely before proceeding to the next step, as moisture can prevent the dye from adhering properly to the leather.
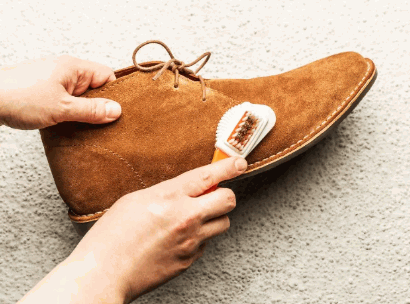
Sanding the Shoes
After cleaning, lightly sand the surface of the leather shoes to create a rough texture that helps the dye adhere better.
When sanding leather shoes, it’s crucial to use fine-grit sandpaper to avoid causing any damage. Opt for a grit level between 220-400 for a smooth finish. Start by gently sanding in a circular motion, applying light pressure to maintain control. Ensure to sand evenly across the entire surface to prevent any uneven coloring later on. Take breaks periodically to check the texture and avoid over-sanding. The goal is to achieve a consistent, lightly textured surface that will enhance the dye absorption and overall color quality.
Applying Leather Preparer
Next, apply Leather Preparer to further clean the surface and ensure it is ready to absorb the dye.
Before moving on to the actual dyeing process, the application of the leather preparer plays a crucial role in achieving a smooth and even coloring. Leather Preparer helps to remove any leftover dirt, oils, or residue from the leather, ensuring a clean canvas for the dye to adhere to.
By prepping the leather in this way, the dyeing process becomes more effective and long-lasting, as the dye can penetrate the material evenly. This step is essential for achieving vibrant and consistent coloring across the entire surface of the leather.
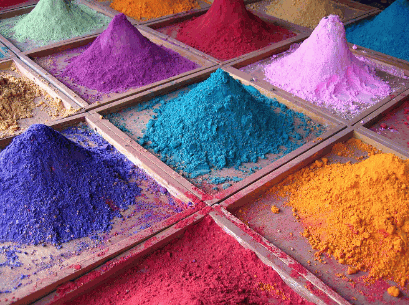
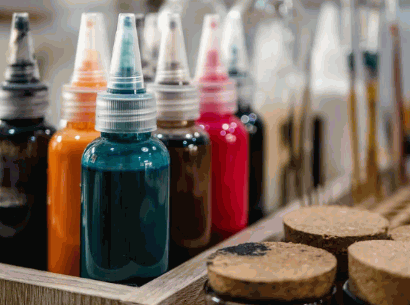
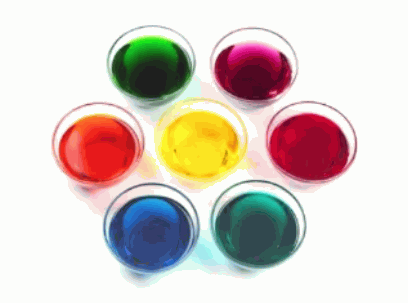
What Types of Dyes Can Be Used?
There are several types of dyes that can be used to color leather shoes, each offering different benefits and finishes. The most common types include water-based dyes, alcohol-based dyes, and oil-based dyes.
Check out: Can I Dye A Leather Jacket
Water-based Dyes
Water-based dyes, such as Jacquard and Dye-na-Flow, are known for being environmentally friendly and easy to use, making them a popular choice for DIY projects.
One of the main advantages of water-based dyes is their eco-friendly nature, as they contain fewer harsh chemicals than solvent-based alternatives. This makes them a safer option for both the user and the environment. These dyes are often more vibrant and offer a wide range of colors to choose from, allowing for creative freedom in customizing leather items.
On the downside, water-based dyes can sometimes require more coats to achieve the desired color intensity compared to solvent-based dyes. They also have a tendency to soak into the leather quickly, potentially leading to uneven coloring if not applied carefully.
Alcohol-based Dyes
Alcohol-based dyes, like Saphir Tinteure Française, offer deep, vibrant colors and quick drying times, making them ideal for professional-quality finishes.
One of the notable advantages of alcohol-based dyes is their excellent color penetration, ensuring a uniform and consistent hue on various surfaces. These dyes are known for their resistance to fading over time, resulting in long-lasting and vibrant results. Alcohol-based dyes tend to dry faster than their water-based counterparts, which can be advantageous for projects that require quick turnaround times.
It is essential to be cautious when using alcohol-based dyes, as they can be flammable and emit strong fumes. Adequate ventilation is crucial to ensure safety during application. Alcohol-based dyes may have a stronger odor compared to water-based options, which could be a drawback for individuals sensitive to scents.
Oil-based Dyes
Oil-based dyes penetrate deeply into the leather, providing a rich, long-lasting color that resists fading.
These dyes offer several benefits that make them a popular choice for leather crafting. Their ability to seep into the material ensures a uniform and vibrant finish, enhancing the natural beauty of the leather. Oil-based dyes are known for their excellent color retention over time, maintaining the integrity of the leather’s hue even with regular use. The application process is straightforward; simply apply the dye evenly using a sponge or brush, allowing it to dry completely for a durable result.
How to Dye Leather Shoes?
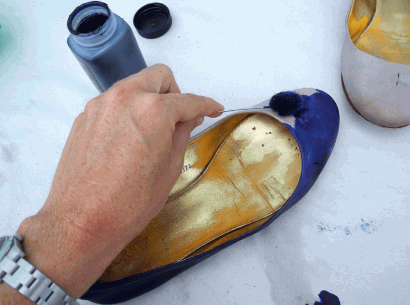
Dyeing leather shoes is a meticulous process that involves applying the dye in layers to achieve the desired color intensity. Start by using a high-quality brush to apply the dye evenly across the shoe’s surface.
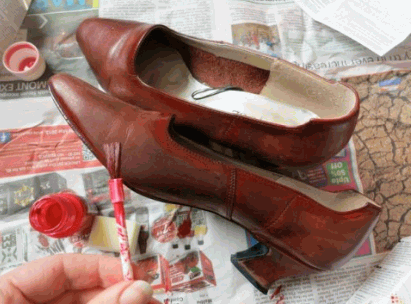
Applying the Dye
Using a brush, apply a thin, even coat of dye from brands like Saphir or Tarrago Leather, ensuring full coverage while avoiding streaks.
Regarding selecting the appropriate brush for the job, opt for one with soft bristles to prevent scratching the leather surface. Start by loading the brush with a moderate amount of dye and begin the application process with gentle, smooth strokes.
Ensuring that you work in small sections at a time will help maintain consistency and avoid missing spots.
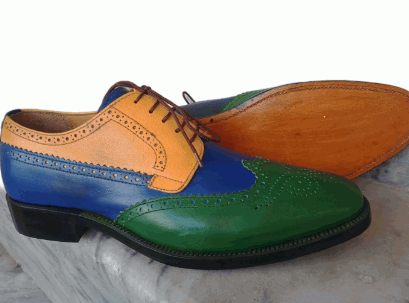
Dyeing Multiple Colors
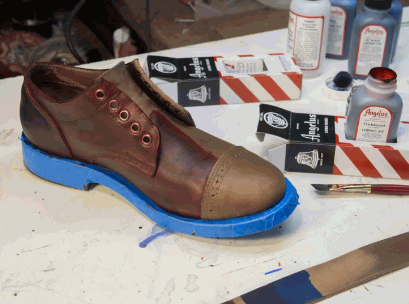
For dyeing leather shoes with multiple colors, use painter’s tape to section off areas and apply each color separately to prevent bleeding.
When using painter’s tape, make sure to press it down firmly to create clean lines between colors. Start with the lightest color first and allow it to dry completely before moving on to the next color to avoid smudging or mixing. Consider layering colors to create depth and dimension in your design.
To achieve a precise and professional look, use a fine-tipped brush or sponge applicator for detailed work. For intricate designs, take your time and work carefully to ensure each color is applied precisely where you want it.
How to Seal the Dye?
Sealing the dye is a crucial step to ensure the color remains vibrant and doesn’t rub off. There are several products available, such as leather finishers and acrylic finishers, that create a protective layer over the dyed surface.
Using a Leather Finisher
After the dye has dried, apply an even coat of Leather Finisher to protect the color and give your leather shoes a polished look.
To achieve the best results, make sure the surface is clean and dry before applying the finisher. Using a soft cloth or sponge, gently spread an even layer of the product, working in small sections to ensure thorough coverage. Allow each coat to dry completely before applying the next one; typically, it is recommended to apply 2-3 coats for optimal protection and shine. The drying time between coats may vary depending on the humidity and temperature conditions, so it’s essential to follow the manufacturer’s instructions for the specific product you are using.
Using a Leather Sealer
A leather sealer can provide an additional layer of protection, ensuring the dye finish is durable and long-lasting.
When applying a leather sealer, start by thoroughly cleaning the leather surface to remove any dirt or impurities using a leather cleaner. Allow the leather to dry completely before applying the sealer to ensure proper adhesion.
- Leather sealers offer benefits such as protecting the leather from stains, water damage, and UV rays, prolonging the life of your leather goods. They also help to maintain the natural look and feel of the leather while providing a shield against everyday wear and tear.
It is important to note that a leather sealer differs from a leather finisher. While a sealer primarily focuses on protection, a finisher enhances the aesthetic appeal of the leather by adding a sheen or altering the color.
To achieve the best results when using a leather sealer, apply thin, even coats with a soft cloth or sponge, allowing each layer to dry before adding another coat. Avoid over-saturating the leather, as this can lead to uneven coverage and a sticky finish.
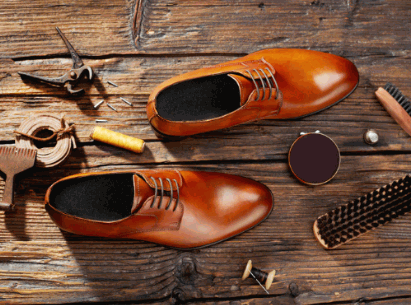
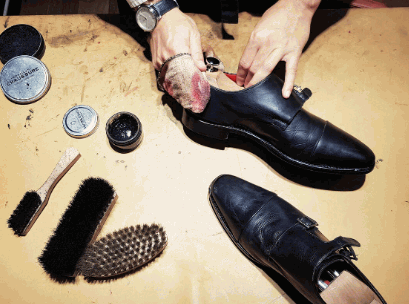
Tips for Maintaining Dyed Leather Shoes
Maintaining dyed leather shoes involves regular polishing and using a horsehair brush to keep them looking their best.
To ensure your dyed leather shoes maintain their vibrant color and shine, it’s important to follow some key maintenance tips.
- Start by using a gentle leather cleaner to remove any dirt or dust particles from the surface.
- Once clean, apply a high-quality leather conditioner to keep the material supple and prevent cracking.
For polishing, opt for a clear shoe cream or wax specifically designed for dyed leather. Apply a thin, even layer and buff gently with a soft cloth to bring out the shine. To protect against water damage, consider using a waterproofing spray specifically formulated for leather shoes.

What Are the Common Mistakes to Avoid?
Common mistakes in the dyeing process include not properly preparing the leather and applying the dye unevenly.
- Another pitfall to watch out for is using the wrong type of dye for the leather. It’s crucial to match the dye with the specific type of leather you are working with to ensure optimal results.
- Rushing the drying process can lead to streaks and blotches. Taking your time and allowing each layer of dye to fully dry before applying the next is key to achieving a smooth and consistent color.
- Failing to clean and degrease the leather thoroughly before dyeing can result in poor adhesion and uneven coloring. Using a quality leather cleaner and degreaser will help the dye bond effectively and create a uniform finish.
- Remember to also protect your work surface and wear gloves to prevent staining your hands during the dyeing process.


